If you’re building an app and need a reliable backend, Firebase might be just what you’re looking for. It’s a platform by Google that helps you add powerful features like real-time database, cloud storage, user login, and serverless functions—all without managing any servers.
Many developers love using Firebase because it saves time and makes app development much easier. You don’t have to set up your backend or write complicated code to handle authentication, data, or file storage. Firebase takes care of it with simple tools you can plug into your project.

In this guide, you’ll learn how to use Firebase step by step. You’ll understand how to use Firebase storage for free, set up authentication, connect to a database, and even run backend code with Firebase functions.
You’ll also see how to use Firebase in Flutter, React, Android Studio, React Native, and Python. Whether you’re just starting or want to upgrade your app with more features, this guide will help you get started the right way.
What is Firebase?
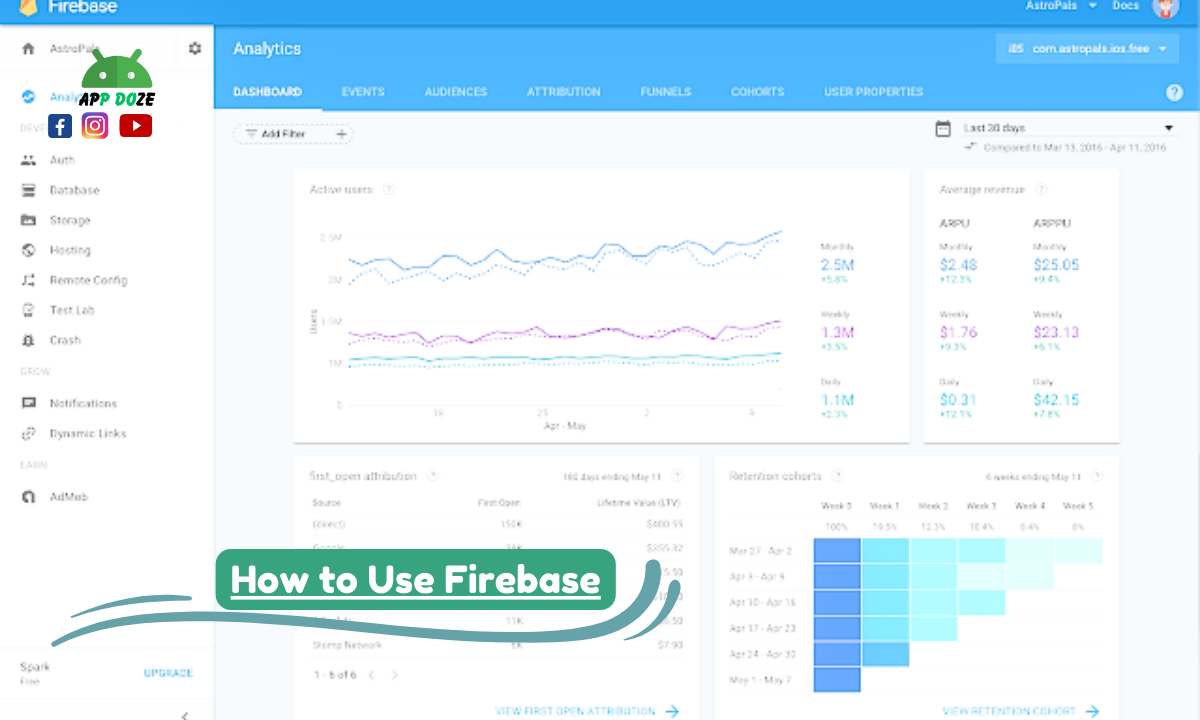
Firebase is a platform from Google that works as a backend-as-a-service (BaaS). That means it gives you all the tools you need to run the backend part of your app—without setting up your server. It handles everything from storing user data to managing logins, sending notifications, and running backend code.
There are four main services you’ll likely use with Firebase:
- Storage: This lets you upload and store files like images, videos, or documents. You can also serve those files to your users.
- Authentication: This service helps you add login options to your app, such as email/password, Google login, or phone number.
- Database: Firebase gives you two types of databases—Realtime Database and Firestore. Both are NoSQL and sync data across users in real time.
- Functions: Firebase Functions let you run backend code in response to events, like when a user signs up or updates data. You can also trigger functions through API requests.
Firebase supports both mobile and web apps. So whether you’re building an Android app, iOS app, or a web application, Firebase can work with it. You can also integrate Firebase with popular tools like Flutter, React, React Native, Android Studio, and even Python scripts.
It’s fast, beginner-friendly, and free to start with. That’s why so many developers prefer Firebase when they want to build apps quickly without handling server-side issues..
How to Use Firebase Storage Firebase Pricing: What You Can Use for Free
When you’re just starting with Firebase, the good news is—you can use many of its services without paying anything. Firebase offers a free plan called the Spark Plan. It gives you access to the core tools you need to build and test your app.
If you’re wondering how to use Firebase storage for free, the Spark Plan includes a decent amount of storage space. You get up to 1 GB of storage and 5 GB of downloads per month. That’s usually enough for small projects, testing, or apps that don’t require heavy media files. You can upload images, small videos, or user-generated files without any issue.
For the Firebase Realtime Database or Firestore, the free tier gives you a limited amount of data storage and read/write operations. This means you can test how the database works and even build small apps without paying. It’s a great way to get familiar with how to use the Firebase database.
Authentication is also included in the free plan. You can add email and password login, phone number sign-in (limited), and even use providers like Google and Facebook. So, if you’re looking for how to use Firebase for authentication, you don’t need to worry about any cost in the beginning.
Cloud Functions are also available in the free tier, but the number of invocations (times your backend code runs) is limited. If your app starts getting lots of traffic or does heavy backend work, you might hit the free usage limits.
Here’s a quick look at what’s included in Firebase’s free plan:
- 1 GB Cloud Storage
- 5 GB downloads per month
- 50,000 document reads/day in Firestore
- 20K writes and 1 GB of data stored
- 10K monthly authentications
- 125K Cloud Function invocations/month
- Hosting with 1 GB storage and 10 GB bandwidth
If your app grows or your needs go beyond the free tier, you can upgrade to the Blaze Plan. It charges you based on how much you use. This is useful when you need more storage, want higher limits, or want to connect Firebase to paid Google Cloud services.
Firebase Storage is used to save and serve files like images, videos, audio, or any user-generated content. If you’re building an app where users upload profile pictures, share photos, or save files, Firebase Storage gives you an easy and secure way to manage all that data.
The best is that you can start using Firebase Storage for free. This is perfect if you’re learning or working on a small project. The free plan gives you 1 GB of storage and 5 GB of downloads per month. That’s usually enough if you’re not storing large media files or if your app is just getting started.
How to Set Up Firebase Storage in Your Project
Before you can upload or download files, you need to add Firebase to your app. The steps can change depending on what platform you’re using, like Flutter, React, or Android Studio, but the general idea stays the same.
Here’s a basic setup flow:
- Go to the Firebase Console and create a new project.
- Select Storage from the left menu and click “Get Started.”
- Set your storage rules. For testing, you can allow read and write access to all users, but later, you should secure it with authentication.
- Connect your app to Firebase using the SDK that matches your platform (like Firebase JS SDK for web or Firebase SDK for Android).
- Use the Firebase Storage module in your code to upload, download, and manage files.
Store and Retrieve Files
To store a file, you usually select a file from your device, convert it if needed, and upload it using Firebase’s method. Here’s a quick example in JavaScript for the web:
const storageRef = firebase.storage().ref();
const fileRef = storageRef.child(‘uploads/photo.jpg’);
fileRef.put(file).then(() => {
console.log(‘File uploaded successfully’);
});
To get that file back and show it in your app:
fileRef.getDownloadURL().then((url) => {
console.log(‘File available at’, url);
});
These steps will be different if you’re using Firebase in Flutter, React Native, or Android Studio, but the logic is the same. You upload to a path, then get the download link.
You might be wondering if Firebase Storage will stay free forever. The answer is yes and no. Firebase lets you use storage for free within limits. Once you pass the 1 GB storage or 5 GB downloads per month, you’ll need to upgrade to the Blaze Plan. The good news is that the Blaze Plan only charges you for what you use. So, if you only go slightly above the free limits, the cost will still be low.
Also, don’t forget to add security rules to protect your files. You can set rules so only logged-in users can upload or access files. This keeps your app safe and prevents misuse.
If you want more technical details, Firebase’s official guide is very helpful. You can check it here: Firebase Storage Documentation
How to Use Firebase for Authentication
Firebase Authentication helps you add secure login and signup features to your app. You don’t need to build everything from scratch. With Firebase, you can set up user accounts quickly using email, password, phone number, or even Google login. It works well for both mobile and web apps.
Why Use Firebase Authentication?
Firebase handles user registration, login, and even account recovery. It also keeps the user session active. You can focus more on your app and less on managing user data. Whether you’re using Flutter, React, Android Studio, or React Native, Firebase Authentication can be integrated easily.
Steps to Add Firebase Auth to Your Project
- Create a Firebase Project Go to the Firebase Console and make a new project if you haven’t already.
- Enable Authentication Methods In the Firebase Console, open “Authentication,” then go to the “Sign-in method” tab. Choose which login methods you want to support, like:
- Email/Password
- Phone number
- Connect Your App: Add the Firebase SDK to your app based on your platform (Web, Android, Flutter, etc.).
- Write Code for Login/Signup
Here’s a simple example using email and password login in JavaScript:
javascript
CopyEdit
firebase.auth().createUserWithEmailAndPassword(email, password) .then((userCredential) => { console.log(“User signed up:”, userCredential.user); }) .catch((error) => { console.log(“Error:”, error.message); });
To log in:
javascript
CopyEdit
firebase.auth().signInWithEmailAndPassword(email, password) .then((userCredential) => { console.log(“User logged in:”, userCredential.user); }) .catch((error) => { console.log(“Error:”, error.message); });
To sign in with Google, you can use:
javascript
CopyEdit
var provider = new firebase.auth.GoogleAuthProvider(); firebase.auth().signInWithPopup(provider) .then((result) => { console.log(“Google sign-in successful:”, result.user); }) .catch((error) => { console.log(“Error:”, error.message); });
Phone number sign-in is also available, but it may need extra setup, like reCAPTCHA for web apps.
Keep in Mind
When using Firebase Authentication, make sure your users’ data is protected. Firebase helps with that by handling session tokens and password security. But you should also secure other parts of your app, like storage and database, by allowing access only to authenticated users.
If you want users to stay signed in, Firebase handles session persistence automatically unless you change it in your settings.
How to Use Firebase Database
Firebase offers two types of databases you can use in your app — Realtime Database and Cloud Firestore. Both are NoSQL, but they work a little differently. If you’re wondering how to use Firebase Database, first, you need to understand which one fits your project better.
Realtime Database vs. Firestore
Realtime Database is the original database from Firebase. It stores data as one big JSON tree. It’s great when you want fast updates and a simple structure.
Cloud Firestore is the newer one. It’s more advanced and flexible. It stores data in collections and documents, more like a file system. It also supports stronger queries and better scaling.
If your app needs more complex data and you want smoother performance at scale, Firestore is usually the better choice.
How to Add Firebase Database to Your App
Here’s how you can start using Firebase Database in your project:
- Set Up Firebase in Your Project Go to the Firebase Console, create a new project (or use an existing one), and register your app. Follow the instructions to add the Firebase SDK to your app.
- Choose Your Database In the Firebase Console, go to the “Build” section and select either Realtime Database or Firestore. Then click “Create database.”
- Set Rules Choose between test mode or locked mode. For learning, you can start with test mode, but don’t forget to change the rules later for security.
- Add Database SDK Add the SDK to your app based on the platform you are using — Flutter, React, Android Studio, React Native, or Python.
How to Use Firebase Database (Basic Functions)
Once everything is set up, you can start reading and writing data.
For Realtime Database in JavaScript:
Write data:
javascript
CopyEdit
firebase.database().ref(‘users/’ + userId).set({ username: “John”, email: “[email protected]” });
Read data:
javascript
CopyEdit
firebase.database().ref(‘users/’ + userId).once(‘value’) .then((snapshot) => { const userData = snapshot.val(); console.log(userData); });
For Firestore:
Write data:
javascript
CopyEdit
firebase.firestore().collection(“users”).doc(“userId”).set({ name: “Sara”, age: 25 });
Read data:
javascript
CopyEdit
firebase.firestore().collection(“users”).doc(“userId”).get() .then((doc) => { if (doc.exists) { console.log(“Data:”, doc.data()); } });
Real-Time Sync
One big reason developers like Firebase Database is real-time syncing. Any changes made by one user are instantly updated for all users without needing to refresh. This works best for things like chat apps, live dashboards, and collaboration tools.
To listen for real-time updates in Realtime Database:
javascript
CopyEdit
firebase.database().ref(‘messages/’).on(‘value’, (snapshot) => { const messages = snapshot.val(); console.log(messages); });
Firestore also supports real-time updates using the onSnapshot() method.
javascript
CopyEdit
firebase.firestore().collection(“messages”).onSnapshot((snapshot) => { snapshot.forEach((doc) => { console.log(doc.data()); }); });
How to Use Firebase Functions
If you want to run backend logic without setting up a server, Firebase Functions can help you do that. They are part of Firebase’s serverless platform. You write your code, and Firebase runs it only when needed.
Learning how to use Firebase Functions is useful when your app needs to handle tasks like sending notifications, running background jobs, or processing data after a user signs up.
What Firebase Functions Are
Firebase Functions (also called Cloud Functions for Firebase) let you run JavaScript or TypeScript code in the cloud. These functions are triggered by events — like a user signing in, writing to the database, or making an HTTP request.
Since they are serverless, you don’t need to manage any servers. Firebase takes care of that part for you.
When to Use Firebase Functions
You can use Firebase Functions for:
- Sending welcome emails after sign-up
- Processing payments securely
- Updating related data automatically
- Running tasks on a schedule
- Creating custom APIs for your app
They work well when your app needs some backend logic, but you don’t want to maintain a whole server.
Setting Up Firebase Functions
To start using Firebase Functions, follow these steps:
- Install Firebase Tools Make sure you have Node.js installed, then install Firebase CLI:nginxCopyEditnpm install -g firebase-tools
- Login to Firebase Log in to your Firebase account from the terminal:nginxCopyEditfirebase login
- Initialize Firebase in Your Project In your project folder, run:bashCopyEditfirebase init This will ask you to choose a Firebase project and language (JavaScript or TypeScript). It sets up a functions directory with everything you need.
- Write Your First Function
Here is a basic example of a function that returns a message when called:
javascript
CopyEdit
const functions = require(‘firebase-functions’); exports.helloWorld = functions.https.onRequest((request, response) => { response.send(“Hello from Firebase!”); });
- Deploy Your Function
To upload your function to Firebase, run:
bash
CopyEdit
firebase deploy –only functions
Now your function is live, and you get a URL to access it.
Calling the Function
If you created an HTTPS function, you can call it like any other API endpoint. For example, open the URL in your browser or call it using fetch() from your app:
javascript
CopyEdit
fetch(‘https://your-region-your-project.cloudfunctions.net/helloWorld’) .then(response => response.text()) .then(data => console.log(data));
You can also trigger functions when something changes in Firebase Authentication, Firestore, or Realtime Database. This is useful when you want to automate tasks inside your app.
How to Use Firebase in Flutter
If you are building apps with Flutter, connecting Firebase can make your work easier. Firebase helps you handle login, data storage, and much more without creating your backend. Many developers now use it to manage everything from user accounts to cloud functions.
Learning how to use Firebase in Flutter is a good step if you want to build modern apps that are fast and secure.
How to Connect Firebase to a Flutter App
To begin, you first need to set up Firebase in your Flutter project. Here are the basic steps:
- Create a Firebase Project Go to the Firebase Console and create a new project. Give it a name and follow the steps.
- Register Your App Choose the Android or iOS icon in the Firebase Console to register your Flutter app. For Android, you’ll need your app’s package name.
- Download the Configuration File
- For Android: download google-services.json and place it in the android/app folder.
- For iOS: download GoogleService-Info.plist and add it to your Xcode project.
- Add Firebase SDK to Flutter
Open your Flutter project and add these packages to pubspec.yaml:
yaml
CopyEdit
dependencies: firebase_core: latest_version firebase_auth: latest_version # For authentication firebase_storage: latest_version # For file storage
Then run:
arduino
CopyEdit
flutter pub get
- Initialize Firebase in Your App
Inside your main.dart file, initialize Firebase before running your app:
dart
CopyEdit
void main() async { WidgetsFlutterBinding.ensureInitialized(); await Firebase.initializeApp(); runApp(MyApp()); }
Now you’re ready to use Firebase in your Flutter app.
Example: Firebase Authentication in Flutter
To learn how to use Firebase authentication in Flutter, start by adding the login feature. You can use email/password, Google, or phone login.
Here is a simple email and password login example:
dart
CopyEdit
import ‘package:firebase_auth/firebase_auth.dart’; Future<void> signIn(String email, String password) async { try { UserCredential userCredential = await FirebaseAuth.instance .signInWithEmailAndPassword(email: email, password: password); print(“Logged in: ${userCredential.user?.email}”); } catch (e) { print(“Login failed: $e”); } }
For signup, you just need to replace signInWithEmailAndPassword with createUserWithEmailAndPassword.
You can also add Google Sign-In and phone login by using extra plugins like google_sign_in and firebase_auth.
Example: Firebase Storage in Flutter
If you want to store files like images or documents, you need to understand how to use Firebase Storage in Flutter. Here’s a quick example:
dart
CopyEdit
import ‘dart:io’; import ‘package:firebase_storage/firebase_storage.dart’; Future<void> uploadFile(File file) async { try { await FirebaseStorage.instance .ref(‘uploads/file-name.jpg’) .putFile(file); print(“File uploaded successfully”); } catch (e) { print(“Upload failed: $e”); } }
You can also download files or show uploaded images in your app using getDownloadURL().
How to Use Firebase in Flutter
If you’re developing a Flutter app and need backend services like authentication, storage, or a database, Firebase is an excellent choice. It simplifies many tasks that would otherwise require setting up your backend server. Firebase integrates smoothly with Flutter, making it easier for you to build and manage your app.
How to Connect Firebase to a Flutter App
Before you can use Firebase in your Flutter project, you need to connect your app to Firebase. Here’s a step-by-step guide to get started:
- Create a Firebase Project
- Go to the Firebase Console.
- Create a new project and follow the setup steps. You don’t need to enable Google Analytics for your project if you don’t want to.
- Register Your App with FirebaseOnce your Firebase project is created, you need to register your Flutter app with Firebase.
- For Android: In the Firebase Console, click on the Android icon, then provide your app’s package name and download the google-services.json file. Place this file in the android/app directory of your Flutter project.
- For iOS: Click the iOS icon, enter the iOS bundle ID, and download the GoogleService-Info.plist file. Add this file to your Xcode project.
- Add Firebase SDK to Your Flutter ProjectYou now need to add the required Firebase dependencies to your project. Open the pubspec.yaml file and add these lines under dependencies:yamlCopyEditdependencies: firebase_core: latest_version firebase_auth: latest_version # For Authentication firebase_storage: latest_version # For StorageThen, run the command flutter pub get in your terminal to install these dependencies.
- Initialize Firebase in Your Flutter AppBefore using Firebase services, you need to initialize Firebase. To do this, add the following code to the main.dart file in your Flutter project:dartCopyEditvoid main() async { WidgetsFlutterBinding.ensureInitialized(); await Firebase.initializeApp(); runApp(MyApp()); }This ensures that Firebase is set up and ready to be used in your app.
Example: Using Firebase Authentication in Flutter
One of the most common Firebase services you’ll likely use is Firebase Authentication. Whether you want to let users log in via email/password, Google, or even phone number, Firebase makes it simple.
To get started with how to use Firebase authentication in Flutter, here’s an example for email and password login:
- Add Firebase Auth to your project by including firebase_auth in your pubspec.yaml file (as shown earlier).
- To log in a user, use the sign In With Email And Password method: dartCopyEditimport ‘package:firebase_auth/firebase_auth.dart’; Future<void> signIn(String email, String password) async { try { UserCredential userCredential = await FirebaseAuth.instance .signInWithEmailAndPassword(email: email, password: password); print(“Logged in successfully: ${userCredential.user?.email}”); } catch (e) { print(“Login failed: $e”); } }
- For registration, simply use createUserWithEmailAndPassword:dartCopyEditFuture<void> signUp(String email, String password) async { try { UserCredential userCredential = await FirebaseAuth.instance .createUserWithEmailAndPassword(email: email, password: password); print(“User created: ${userCredential.user?.email}”); } catch (e) { print(“Registration failed: $e”); } }
You can also implement Google login or phone number authentication using Firebase Auth, but this requires additional setup, like integrating the Google Sign-In API or verifying phone numbers with OTPs.
Example: Using Firebase Storage in Flutter
If your app needs to store files, Firebase Storage is the solution. You can store images, videos, and other files and even access them from your app. Here’s an example of how to use Firebase storage in Flutter:
- First, add firebase_storage to your pubspec.yaml file (as mentioned above).
- Then, to upload a file to Firebase Storage, use the following code:dartCopyEditimport ‘dart:io’; import ‘package:firebase_storage/firebase_storage.dart’; Future<void> uploadFile(File file) async { try { await FirebaseStorage.instance .ref(‘uploads/file-name.jpg’) // specify file path .putFile(file); // upload file print(“File uploaded successfully”); } catch (e) { print(“File upload failed: $e”); } }
- To get the file’s download URL, you can use:dartCopyEditString downloadURL = await FirebaseStorage.instance .ref(‘uploads/file-name.jpg’) .getDownloadURL();
This URL can be used to display the uploaded image or file in your app.
How to Use Firebase in React
React is one of the most popular libraries for building user interfaces, and Firebase can easily be integrated with it to handle backend tasks such as authentication, real-time databases, and file storage. If you’re wondering how to use Firebase in React, this guide will walk you through the necessary steps to get Firebase working with your React application.
Add Firebase SDK to a React Project
Before you can start using Firebase in your React app, you’ll need to add the Firebase SDK. Here’s how to do that:
- Install Firebase SDKOpen your terminal and navigate to your React project directory. Then, install the Firebase SDK by running the following command:bashCopyEditnpm install firebase. This will install the Firebase package, which includes all the necessary libraries for Firebase services like authentication, database, storage, and more.
- Set Up Firebase ProjectGo to the Firebase Console and create a new Firebase project (if you haven’t already). Once the project is created, you’ll need to configure Firebase for your React app.
- In the Firebase console, click on the “Web” icon to add a new web app to your Firebase project.
- Firebase will give you a set of configuration details (API keys, project ID, etc.). You’ll need this information to connect your React app to Firebase.
- Add Firebase Config to Your React App Now that you have your Firebase configuration, you need to integrate it into your React project. In your React project, create a new file (for example, firebase-config.js) and paste the Firebase configuration object there:javascriptCopyEdit// firebase-config.js import { initializeApp } from “firebase/app”; const firebaseConfig = { apiKey: “your-api-key”, authDomain: “your-project-id.firebaseapp.com”, projectId: “your-project-id”, storageBucket: “your-project-id.appspot.com”, messagingSenderId: “your-sender-id”, appId: “your-app-id” }; // Initialize Firebase const app = initializeApp(firebaseConfig); export default app;
Initialize Firebase
After adding the Firebase config to your project, the next step is to initialize Firebase. You already did part of this in the firebase-config.js file above, where you imported and used initializeApp().
Now, you can import Firebase into any React component where you want to use Firebase services. For example, if you want to use Firebase Authentication or Firebase Database, you’ll need to import the necessary modules from Firebase.
For Firebase Authentication:
javascript
CopyEdit
import { getAuth, signInWithEmailAndPassword } from “firebase/auth”;
For Firebase Database (Firestore or Realtime Database):
javascript
CopyEdit
import { getDatabase, ref, set, get } from “firebase/database”;
Use Firebase Authentication or Database with React
Now that Firebase is initialized, you can start using its services in your React components. Let’s see how to use Firebase Authentication and Firebase Database in a simple example.
Using Firebase Authentication in React
To enable user authentication in your React app, you can use Firebase Authentication. Firebase Auth provides several methods for login, such as email/password authentication, Google sign-in, and more. Here’s how you can use email/password authentication:
- Sign Up a New UserCreate a component to handle user sign-up. You can use the createUserWithEmailAndPassword method to register users.javascriptCopyEditimport React, { useState } from “react”; import { getAuth, createUserWithEmailAndPassword } from “firebase/auth”; import app from “./firebase-config”; const SignUp = () => { const [email, setEmail] = useState(“”); const [password, setPassword] = useState(“”); const handleSignUp = async () => { const auth = getAuth(app); try { const userCredential = await createUserWithEmailAndPassword(auth, email, password); console.log(“User signed up:”, userCredential.user); } catch (error) { console.log(“Error signing up:”, error.message); } }; return ( <div> <input type=”email” value={email} onChange={(e) => setEmail(e.target.value)} placeholder=”Email” /> <input type=”password” value={password} onChange={(e) => setPassword(e.target.value)} placeholder=”Password” /> <button onClick={handleSignUp}>Sign Up</button> </div> ); }; export default SignUp;
- Sign In an Existing UserSimilarly, you can implement user login with signInWithEmailAndPassword.javascriptCopyEditimport React, { useState } from “react”; import { getAuth, signInWithEmailAndPassword } from “firebase/auth”; import app from “./firebase-config”; const SignIn = () => { const [email, setEmail] = useState(“”); const [password, setPassword] = useState(“”); const handleSignIn = async () => { const auth = getAuth(app); try { const userCredential = await signInWithEmailAndPassword(auth, email, password); console.log(“User signed in:”, userCredential.user); } catch (error) { console.log(“Error signing in:”, error.message); } }; return ( <div> <input type=”email” value={email} onChange={(e) => setEmail(e.target.value)} placeholder=”Email” /> <input type=”password” value={password} onChange={(e) => setPassword(e.target.value)} placeholder=”Password” /> <button onClick={handleSignIn}>Sign In</button> </div> ); }; export default SignIn;
Using Firebase Database (Firestore) in React
Firebase Database is great for storing and syncing data in real time. Here’s how to read and write data using Firebase Realtime Database:
- Write Data to the DatabasejavascriptCopyEditimport React, { useState } from “react”; import { getDatabase, ref, set } from “firebase/database”; import app from “./firebase-config”; const WriteData = () => { const [userName, setUserName] = useState(“”); const writeUserData = () => { const db = getDatabase(app); set(ref(db, ‘users/’ + userName), { username: userName, }) .then(() => console.log(“Data written successfully”)) .catch((error) => console.log(“Error writing data:”, error)); }; return ( <div> <input type=”text” value={userName} onChange={(e) => setUserName(e.target.value)} placeholder=”Enter username” /> <button onClick={writeUserData}>Save Data</button> </div> ); }; export default WriteData;
- Read Data from the DatabaseYou can also read data in real-time using the get method: javascriptCopyEditimport React, { useState, useEffect } from “react”; import { getDatabase, ref, get } from “firebase/database”; import app from “./firebase-config”; const ReadData = () => { const [data, setData] = useState(null); useEffect(() => { const db = getDatabase(app); const dataRef = ref(db, ‘users/username’); // Change ‘username’ with your desired data path get(dataRef) .then((snapshot) => { if (snapshot.exists()) { setData(snapshot.val()); } else { setData(“No data available”); } }) .catch((error) => { console.log(“Error reading data:”, error); }); }, []); return <div>{data}</div>; }; export default ReadData;
How to Use Firebase in React Native
React Native allows you to build mobile applications using JavaScript and React, and Firebase is a powerful platform that helps with backend functionalities such as authentication, real-time databases, and file storage. If you’re wondering how to use Firebase in React Native, this guide will walk you through the steps required to integrate Firebase with your mobile application.
Steps for Firebase Setup in React Native
Before you can use Firebase in your React Native app, you’ll need to complete a few setup steps. These steps include installing the necessary Firebase packages and linking Firebase services to your React Native app.
- Install Firebase SDK and Required Packages First, you need to install the Firebase SDK and the necessary packages for React Native. You can do this by running the following commands in your project directory:bashCopyEditnpm install @react-native-firebase/appThis installs the core Firebase app package for React Native. Additionally, depending on the Firebase services you plan to use, you’ll need to install specific packages for each service.
- For example, if you plan to use Firebase Authentication or Firebase Firestore (Database), you would install these packages: For Firebase Authentication:bashCopyEditnpm install @react-native-firebase/authFor Firebase Firestore:bashCopyEditnpm install @react-native-firebase/firestoreIf you plan to use other Firebase services such as Firebase Storage, you can install the respective packages as well, such as:bashCopyEditnpm install @react-native-firebase/storage
- Link Firebase to Your React Native Project After installing the Firebase packages, you’ll need to configure Firebase within your React Native project. Firebase provides a simple process for linking Firebase with your React Native app. For Android, ensure that you’ve added the google-services.json file to your android/app folder. This file is provided by Firebase when you create your Firebase project and should be downloaded from the Firebase Console. For iOS, you’ll need to add the GoogleService-Info.plist file into the ios folder. You’ll also need to run the following command to install any required dependencies for iOS:bashCopyEditcd ios/ pod install
- Initialize Firebase in Your Project Firebase needs to be initialized within your React Native project before you can use its features. You can do this by importing Firebase in your project and initializing it as follows:javascriptCopyEditimport firebase from ‘@react-native-firebase/app’; // Initialize Firebase if (!firebase.apps.length) { firebase.initializeApp(); } else { firebase.app(); // if already initialized }This code checks if Firebase has already been initialized and initializes it if it hasn’t been.
Use Case Example: Firebase Authentication
Firebase Authentication is one of the most commonly used features in React Native apps. It allows you to easily add login, signup, and password recovery features to your app.
- Add Firebase Authentication, ensure that the @react-native-firebase/auth package has been installed (as shown earlier). Then, you can use Firebase Authentication in your app. Here’s an example of how to create a simple email/password sign-up and sign-in functionality:javascriptCopyEditimport React, { useState } from ‘react’; import { TextInput, Button, View, Text } from ‘react-native’; import auth from ‘@react-native-firebase/auth’; const AuthExample = () => { const [email, setEmail] = useState(”); const [password, setPassword] = useState(”); const [user, setUser] = useState(null); const handleSignUp = async () => { try { await auth().createUserWithEmailAndPassword(email, password); alert(‘User signed up!’); } catch (error) { console.error(error.message); } }; const handleSignIn = async () => { try { await auth().signInWithEmailAndPassword(email, password); alert(‘User signed in!’); } catch (error) { console.error(error.message); } }; const handleSignOut = async () => { try { await auth().signOut(); setUser(null); alert(‘User signed out!’); } catch (error) { console.error(error.message); } }; return ( <View> <TextInput placeholder=”Email” value={email} onChangeText={(text) => setEmail(text)} /> <TextInput placeholder=”Password” secureTextEntry value={password} onChangeText={(text) => setPassword(text)} /> <Button title=”Sign Up” onPress={handleSignUp} /> <Button title=”Sign In” onPress={handleSignIn} /> <Button title=”Sign Out” onPress={handleSignOut} /> </View> ); }; export default AuthExample; In this example, the handleSignUp function creates a new user with email and password, while handleSignIn signs in an existing user. The handleSignOut function logs out the current user.
- Add Firebase Firestore DatabaseIf you want to use Firebase Firestore (a NoSQL database) for storing and retrieving data, you can set it up like this:javascriptCopyEditimport firestore from ‘@react-native-firebase/firestore’; const AddDataToFirestore = () => { const addData = async () => { try { await firestore().collection(‘users’).add({ name: ‘John Doe’, age: 30, email: ‘[email protected]’, }); alert(‘Data added to Firestore’); } catch (error) { console.error(error.message); } }; return ( <View> <Button title=”Add Data to Firestore” onPress={addData} /> </View> ); }; export default AddDataToFirestore; This example adds a document to the “users” collection in Firebase Firestore. You can replace the data with whatever you need to store in your app.
How to Use Firebase in Android Studio
If you’re developing an Android app, Firebase offers a powerful set of tools to add backend services like authentication, real-time databases, and cloud storage to your app. How to use Firebase in Android Studio is a common question for developers, and it’s easier than you might think. Firebase’s integration with Android Studio makes it straightforward to connect your app with Firebase and use its services.
Here’s a step-by-step guide to help you connect your Android app with Firebase and start using services like Firebase Authentication, Realtime Database, and more.
Connect Android App with Firebase Using Android Studio
Firebase has made it very easy to integrate with Android Studio using its Firebase Assistant tool. The Firebase Assistant helps you set up Firebase services in your Android project, and you don’t need to manually configure most of the settings. Here’s how you can connect your Android app with Firebase:
- Open Android StudioFirst, open your Android project in Android Studio. If you don’t have a project yet, you can create a new Android project by selecting “New Project” from the Android Studio welcome screen. Choose the appropriate template for your app, such as “Empty Activity.”
- Access Firebase AssistantOnce your project is open, you can access the Firebase Assistant in Android Studio by navigating to the Tools menu. From there, go to Firebase. This will open the Firebase Assistant window, where you can view all the Firebase services that you can add to your app.
- Connect Your App to Firebase In the Firebase Assistant window, you’ll see several services listed. You’ll need to link your Android app to Firebase. If your app isn’t already connected to Firebase, click the “Connect to Firebase” option. You will be asked to sign in to your Google account (if not already signed in), and Android Studio will automatically configure your Firebase project. Android Studio will create a google-services.json file and add it to your app’s app directory. This file contains all the necessary configuration information to connect your app to Firebase. Make sure to sync your project with the Firebase settings after this step by clicking on Sync Now when prompted.
Add Services Like Firebase Auth and Firebase Database
Now that your app is connected to Firebase, you can start using Firebase services like Authentication, Firestore, Realtime Database, and more. You can add these services using the Firebase Assistant. Here’s how you can add Firebase Authentication and Firebase Database to your app:
- Firebase Authentication Firebase Authentication allows you to handle user sign-ups, logins, and authentication in your app. To add Firebase Authentication, go to the Firebase Assistant and click on Authentication. You can then choose the type of authentication method you want to use, such as email/password authentication, Google login, or phone authentication. The Firebase Assistant will walk you through the steps of adding the required dependencies and setting up Firebase Authentication in your app. You’ll also be able to enable the authentication methods you want in the Firebase Console .For example, if you’re adding email/password authentication, Firebase will automatically update your build.gradle files with the required dependencies. It will also generate the necessary Java or Kotlin code to handle user sign-in and sign-up in your app. Example code for email/password authentication:javaCopyEditFirebaseAuth mAuth = FirebaseAuth.getInstance(); // Sign up a new user mAuth.createUserWithEmailAndPassword(email, password) .addOnCompleteListener(this, task -> { if (task.isSuccessful()) { // User signed up successfully } else { // Handle sign-up failure } });
- Firebase Realtime Database The Firebase Realtime Database lets you store and sync data between users in real time. To add this service, go back to the Firebase Assistant and click on Realtime Database under the Firebase Database section. You can then follow the steps to enable the Realtime Database in the Firebase Console. Firebase Assistant will automatically add the necessary dependencies to your project, and you’ll be able to start using the database in your app. Example code for writing to Firebase Realtime Database:javaCopyEditDatabaseReference mDatabase = FirebaseDatabase.getInstance().getReference(); // Write data to Firebase Realtime Database mDatabase.child(“users”).child(userId).setValue(user); You can also use the Realtime Database for real-time data syncing, so any changes made to the database will be reflected in your app instantly.
- Firebase Firestore Firebase Firestore is another powerful database service, offering more advanced features compared to the Realtime Database. It stores data in documents and collections and allows for more flexible queries. If you want to use Firestore, you can follow similar steps as for the Realtime Database. In the Firebase Assistant, select Firestore Database, enable it in the Firebase Console, and Firebase Assistant will help you set up Firestore in your Android app.Example code for adding data to Firestore:javaCopyEditFirebaseFirestore db = FirebaseFirestore.getInstance(); // Add a new document with a generated ID db.collection(“users”).add(user);
Final Steps and Considerations
After setting up the Firebase services you need, make sure to test everything thoroughly in your app. Firebase allows you to monitor its services in real time through the Firebase Console, so you can see how data is being handled, track authentication attempts, and ensure everything is running smoothly.
You can also explore other Firebase services, such as Firebase Cloud Messaging (for push notifications), Firebase Analytics (for app usage insights), and Firebase Cloud Storage (for file storage). The Firebase Assistant makes it easy to add these services as well, with clear step-by-step instructions.
How to Use Firebase with Python
Firebase offers great functionality for building real-time applications, and with the Firebase Admin SDK for Python, you can use Firebase as a backend for your Python projects, scripts, or even larger applications. If you’re wondering how to use Firebase with Python, it’s simple and very effective for tasks like reading and writing data to Firestore, managing user authentication, and more. Below is a step-by-step guide to help you get started with Firebase in your Python-based projects.
Firebase Admin SDK for Python
The Firebase Admin SDK for Python allows you to interact with Firebase services directly from your server-side applications or scripts. It provides access to features like Firestore, Firebase Authentication, Firebase Cloud Messaging, and more, all through Python.
To use Firebase with Python, you need to install the Firebase Admin SDK, initialize it, and configure it to interact with your Firebase project. Let’s go through the steps to set this up.
Setting Up Firebase Admin SDK in Python
- Install the Firebase Admin The first step in using Firebase with Python is to install the Firebase Admin SDK. This can be done easily using pip, which is Python’s package installer. Run the following command in your terminal:nginxCopyEditpip install firebase-admin
- Initialize Firebase Admin SDKAfter installing the SDK, you’ll need to initialize it using your Firebase project’s credentials. For this, you will need to download a service account key from your Firebase project’s settings.
- Go to the Firebase Console.
- Select your Firebase project.
- Navigate to Project Settings.
- Under the Service accounts tab, click Generate new private key. This will download a JSON file with your credentials.
How to Use Firebase with Python: Firestore Example
Let’s now look at an example of how you can read and write data to Firestore using Python.
- Write Data to Firestore Firebase’s Firestore database is a flexible, scalable database for mobile, web, and server development. You can use it to store your data in collections and documents. In Python, writing data to Firestore is as easy as using the Firestore client from the Admin SDK. Here’s an example of how to add data to Firestore:pythonCopyEditfrom firebase_admin import firestore # Get Firestore client db = firestore.client() # Reference to a collection users_ref = db.collection(‘users’) # Add data to the collection users_ref.add({ ‘first_name’: ‘John’, ‘last_name’: ‘Doe’, ‘age’: 30 })In this example, we are adding a new document to the users collection. The add method generates a unique document ID automatically, but you can also specify a document ID if needed.
- Read Data from Firestore read data from Firestore you can use the get method to retrieve documents from a collection. Here’s an example of how to fetch and print data from the users collection:pythonCopyEdit# Reference to the users collection users_ref = db.collection(‘users’) # Fetch all documents in the collection docs = users_ref.stream() # Loop through documents and print data for doc in docs: print(f'{doc.id} => {doc.to_dict()}’)This code retrieves all documents in the users collection and prints their content. The to_dict() method converts the document into a Python dictionary, which makes it easy to work with in your code.
- Update Data in FirestoreIf you want to update an existing document, you can use the update method: pythonCopyEdit# Reference to a specific user document user_ref = db.collection(‘users’).document(‘user_id_here’) # Update user data user_ref.update({ ‘age’: 31 })In this example, we update the age of a specific user document by providing the document ID.
- Delete Data from Firestore delete a document, use the delete method: pythonCopyEdit# Reference to a specific document user_ref = db.collection(‘users’).document(‘user_id_here’) # Delete the document user_ref.delete()This will remove the user document from Firestore.
When to Use Firebase with Python
Using Firebase with Python is ideal for backend applications, automated scripts, or even server-side development. You can use it for various tasks such as:
- Backend services for web or mobile apps: Firebase’s real-time capabilities make it a great choice for backend services that need to sync data in real time across devices.
- Automated tasks: If you want to build automated systems that interact with Firebase data (e.g., for managing user data or pushing notifications), Python makes it easy to integrate with Firebase’s services.
- Serverless functions: If you want to run Python scripts in the cloud using Firebase Functions, you can combine Firebase with Python to process background tasks, send notifications, or handle HTTP requests.
Last Words
As you can see, Firebase is a versatile and powerful tool that can simplify your development process. Whether you’re building an app with Flutter, React, or Android Studio, Firebase can help you manage authentication, storage, databases, and even serverless functions with ease. The integration process is smooth, and with Firebase’s extensive documentation, you can quickly get your projects up and running.
By understanding how to use Firebase effectively, you can build scalable applications and ensure seamless real-time updates. This guide covered various Firebase services, including Firebase Storage, Firebase Authentication, Firebase Database, Firebase Functions, and more. No matter the platform you’re working on, Firebase offers a range of services to cater to your needs.
Remember, Firebase not only simplifies backend tasks but also scales easily as your project grows. It’s a fantastic choice whether you’re just starting or working on a large project.
FAQs
Is Firebase free for personal projects?
Yes, Firebase offers a free tier that allows you to use its basic services like Firebase Authentication, Firebase Realtime Database, Firebase Storage, and Firebase Firestore without any cost. However, there are limits on storage, database usage, and requests. Once you exceed the free limits, you will need to switch to a paid plan.
Can I use Firebase with Python?
Yes, you can use Firebase with Python. By using the Firebase Admin SDK for Python, you can integrate Firebase with your backend or scripts. This allows you to interact with Firebase services like Firestore, Authentication, and more directly from your Python application.
What is the difference between Firebase Realtime Database and Firestore?
Firebase Realtime Database and Firestore are both NoSQL databases, but they differ in some important aspects:
- Realtime Database: It stores data in a large JSON tree and is optimized for simple use cases where data updates in real-time. It is faster for certain types of applications but can be difficult to scale for complex queries.
- Firestore: It is a more flexible and scalable database that stores data in documents and collections. Firestore supports more complex queries and is designed for larger-scale applications. It also offers better integration with Firebase Cloud Functions and works well for serverless applications.

Charles Mata is an experienced app developer and educator, passionate about helping others build powerful mobile applications. He publishes in-depth guides on app development, covering Android Studio, Firebase, Google Play Console, and more. With a practical approach, he simplifies complex coding concepts, making them easy for beginners and advanced developers alike.
Charles also offers a premium website development course, where he teaches step-by-step strategies to build, optimize, and scale websites for success. Whether you’re a beginner looking to learn app development or an entrepreneur wanting to create a website, his expert insights will guide you every step of the way.